Autofill

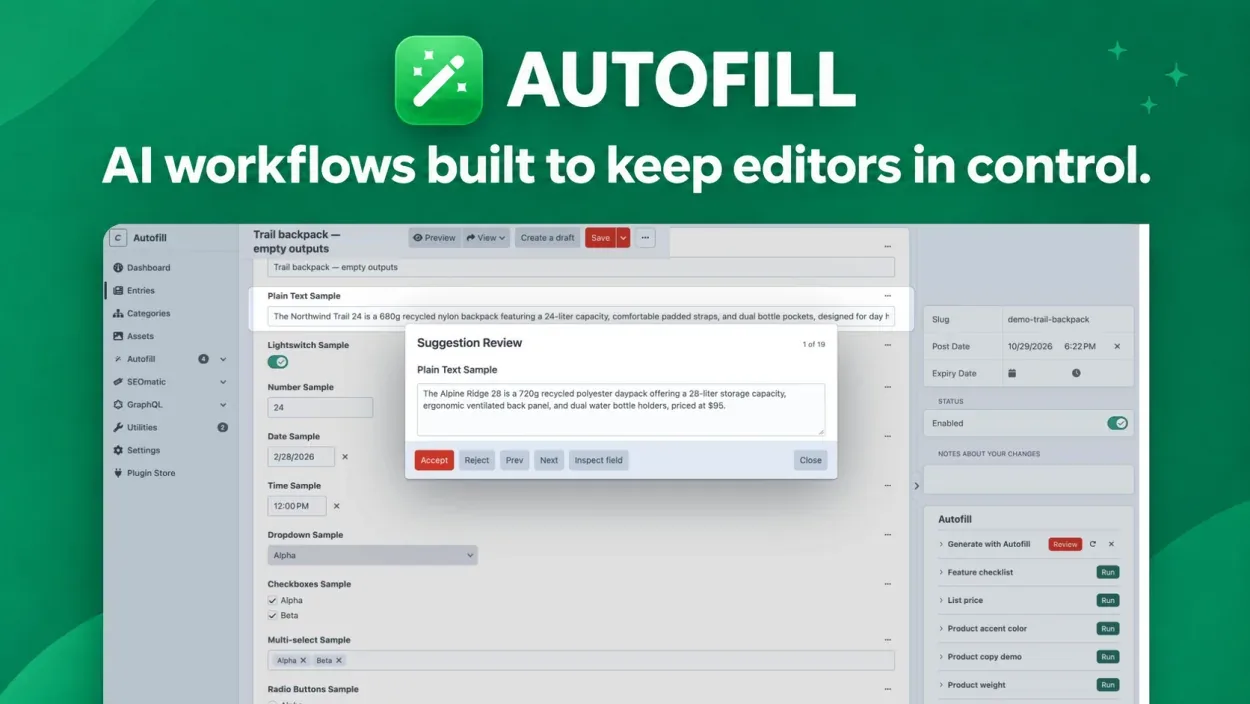
Autofill Main Image

Autofill brings AI into Craft, configured around the way your team works.

Create workflows for specific entry types and decide what information the AI receives, what it should do, and where its suggestions belong.

Editors can run those workflows from their entries, then review and edit the suggestions before applying them.

Think of each workflow as a skill for filling out a specific entry type, with the final decision always in the editor’s hands.

Overview & Getting Started

Autofill generates field suggestions for Craft entries and assets. Workflows define what to read, which fields to fill, and which changes need review.

Requirements

Autofill requires Craft CMS 5.0 or later, PHP 8.2 or later, an enabled AI model, and a working Craft queue.

Installation

Install from the Craft Plugin Store or run:

composer require jt-dev/craft-autofill
./craft plugin/install autofill

Basic Setup Flow

AI Model Configuration

AI Model Configurations settings table

In Settings → Plugins → Autofill, add a model configuration:

  • Internal label: A name for the configuration.
  • Provider: OpenAI, Anthropic, DeepSeek, or Google Gemini.
  • API Key Env: Store the API key in an environment variable and enter its reference, such as $OPENAI_API_KEY. Craft must be able to read the variable from both the web and queue processes. Autofill settings can’t be saved if you enter the key directly.
  • Model ID: Enter a supported model ID. See the model lists for OpenAI, Anthropic, DeepSeek, or Google Gemini. Check that the model supports the inputs your workflow needs.
  • Reasoning: All providers offer Default. OpenAI also offers Low, Medium, and High. DeepSeek also offers None, Low, High, and Max. Anthropic and Google Gemini offer Default only.
  • Enabled: Enable the configuration. The first enabled row is the default.

A workflow can select another enabled model under Advanced → Model.

Request limits

AI requests time out after 30 seconds by default. Set requestTimeout in config/autofill.php to allow more time. Reasoning models may need 60–120 seconds.

Set maxOutputTokens to raise the output limit. Leave it unset or use null to use the provider default. For Anthropic, Autofill uses 8,192 output tokens by default.

To override these defaults, add an optional config/autofill.php file in your Craft project:

return [
    'requestTimeout' => 90,     // seconds, 5–600
    'maxOutputTokens' => 16000, // null uses the provider default
];

Workflows and launchers

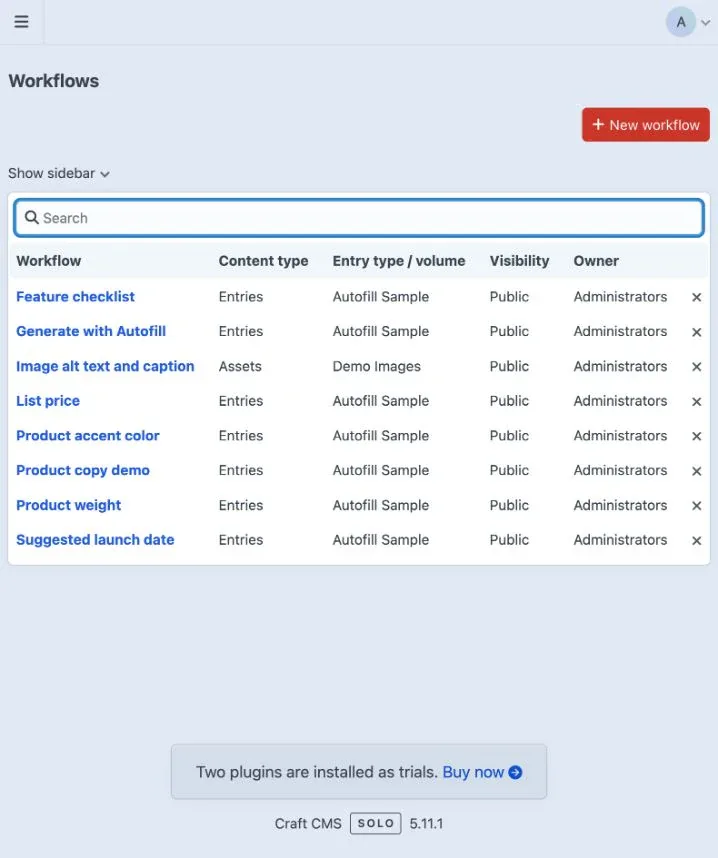
Workflows list with the New workflow button

Open Autofill → Workflows to see your workflows, their content types, entry types or volumes, visibility, and owners.

To create one, select New workflow in the top right.

Create a workflow

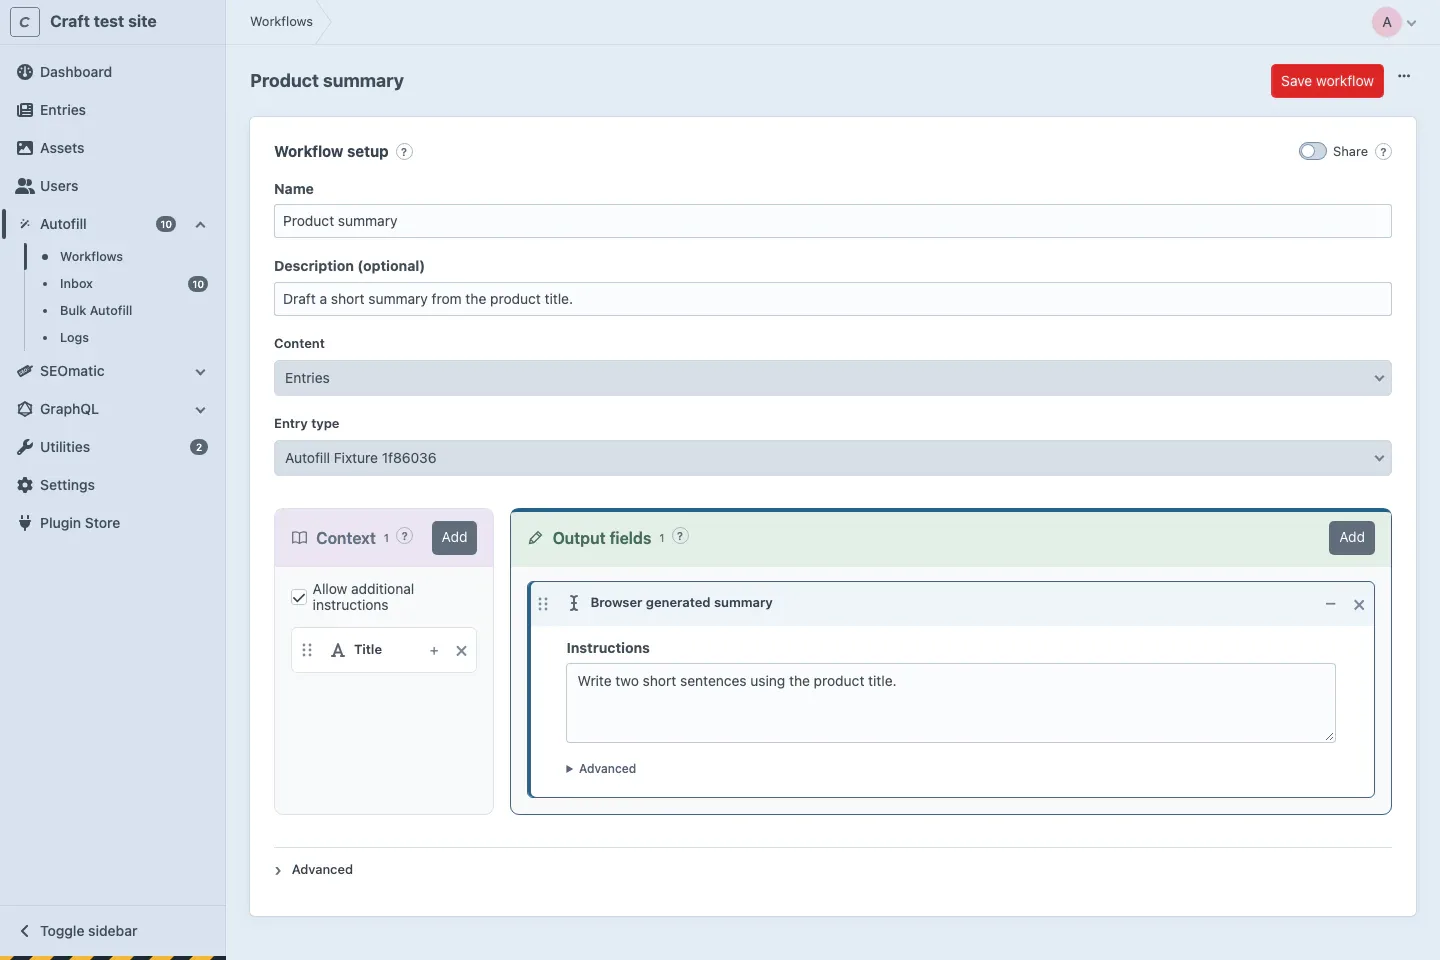
Workflow setup with name, description, content type, and sharing settings
  • Name: Give the workflow a recognizable name.
  • Description: Optionally explain what the workflow does and when to use it. This helps editors and, with future MCP support, connected tools choose when to run it. Add model instructions under Context and Output fields.
  • Content: Select Entries or Assets, then choose the entry type or asset volume the workflow applies to.
  • Share: Turn on sharing to make the workflow available to other users with the necessary Autofill and Craft content permissions. Otherwise, it is private to its creator and administrators.

Choose a launcher

Make the workflow available

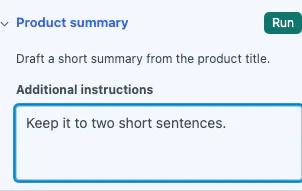
Autofill workflow in an entry sidebar

To show the launcher in the sidebar, open Advanced in the workflow editor and turn on Show this workflow in the entry sidebar or Show this workflow in the asset sidebar. You can also use an Autofill field to place a launcher in the content layout.

Use an Autofill field

  1. Create an Autofill field in Craft’s field settings and enter the workflow handle in its Workflow setting. Find the handle under the workflow’s Advanced settings.
  2. Add the field to the matching entry type’s field layout, wherever editors should see it. For an asset workflow, add it to the matching volume’s layout.
  3. Use Craft’s field layout conditions and permissions to control visibility. The workflow must also be shared with the user, unless it is their private workflow or they are an administrator. Users need the relevant Autofill and Craft permissions to run it.

Deploying: The field and its workflow handle are stored in project config, but the workflow is stored in the database. Create the workflow separately in each environment and use the same handle. You can deploy the field before creating the workflow: its launcher stays hidden until a matching, available workflow exists for that entry type or asset volume.

For file inputs and asset outputs, see Asset inputs and outputs.

Add output fields

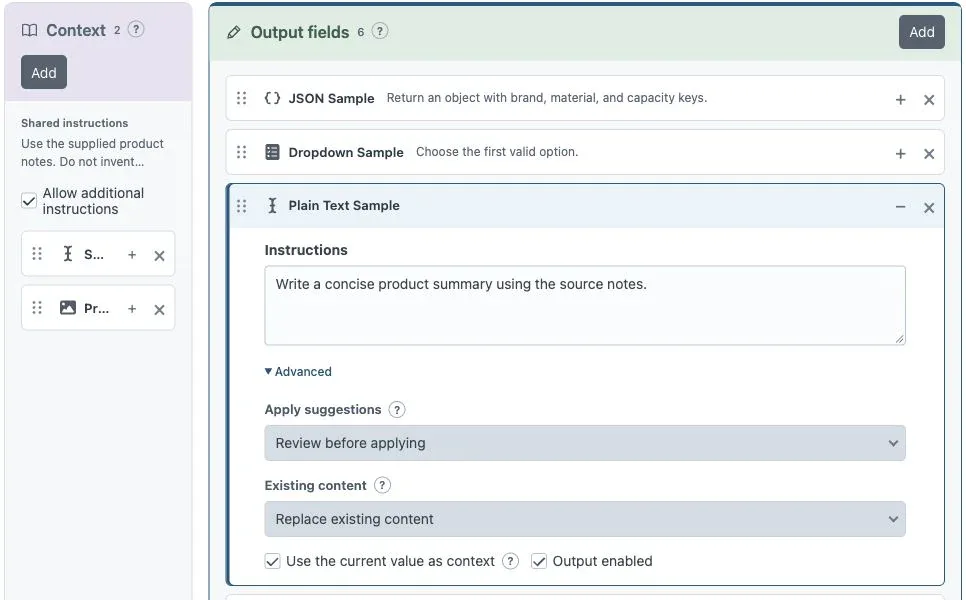
Expanded output field showing instructions and advanced settings

Output fields are the fields Autofill can suggest values for. Under Output fields, select Add, choose a field, and enter instructions for how to fill it. See Supported Fields for available field types.

For each output, open Advanced to choose whether suggestions require review or apply automatically, and whether to fill only empty fields or allow existing content to be replaced. You can also include the current value as context.

Add context

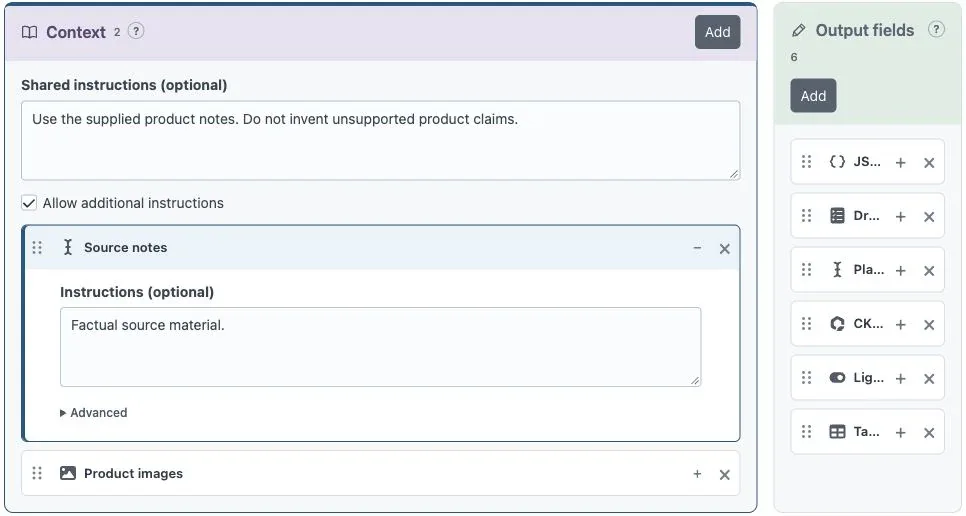
Expanded context field with shared and field instructions

Context fields provide source information to the AI model. Autofill reads their values but does not change those fields through context.

Under Context, select Add and choose a supported field. Add optional instructions to explain how the model should use it. Use Shared instructions for rules that apply to all output fields.

Enable Allow additional instructions to give editors a text box for each run. They can add guidance or paste source material there.

Advanced settings

Choose a model and launcher placement under workflow Advanced. Each output also has its own advanced settings for review, existing content, and field-specific options.

Use Autofill

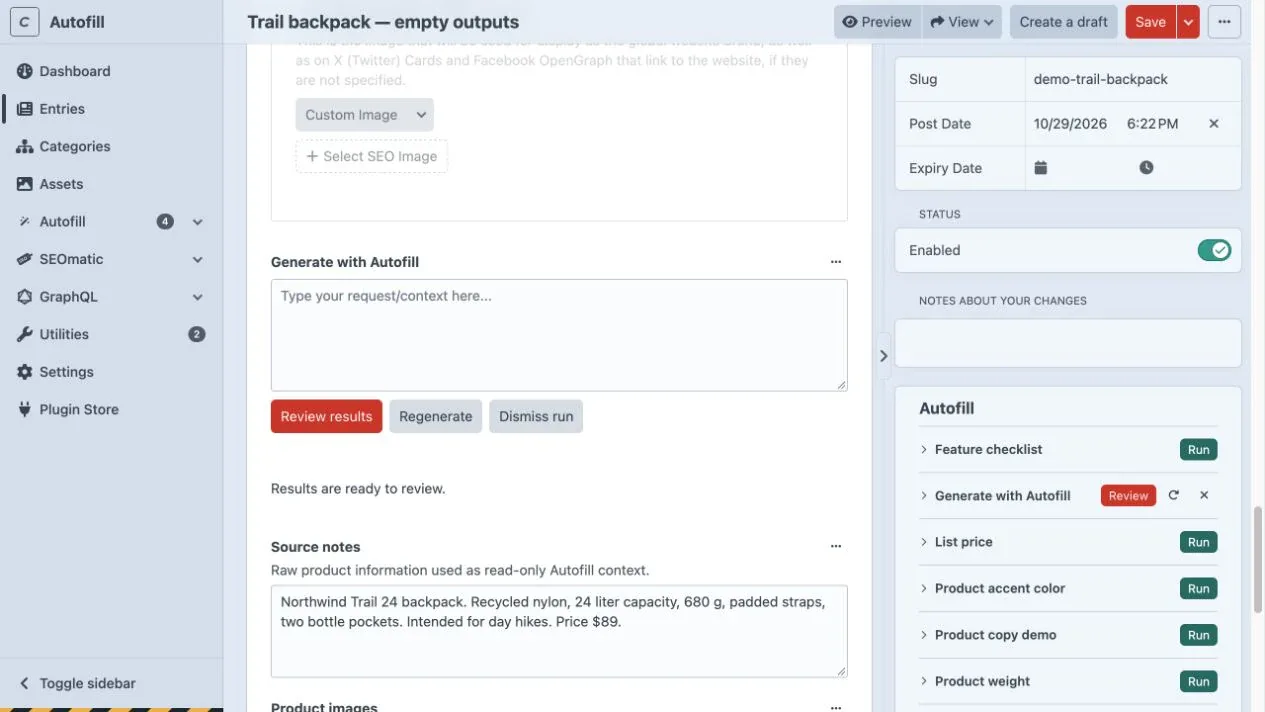
Craft entry with an inline Autofill field and multiple sidebar workflows, including one ready for review

Run a workflow from the entry or asset sidebar, or from an Autofill field in the content. Autofill runs in the background. When suggestions need review, open them on the original item or, in Pro, from the Autofill inbox.

Run a workflow

  1. Open the entry or asset. Find Autofill in the sidebar or in a field on the page.
  2. If available, enter Additional instructions. In the sidebar, click the workflow name to expand it.
  3. Click Run or the inline Autofill button. Autofill saves your edits, then starts generation in the background. Fix any Craft save errors and try again.
  4. When results are ready, click Review or Review results. You can leave and return to the original item later.

Draft runs stay on the draft. They do not update the published entry.

Review results

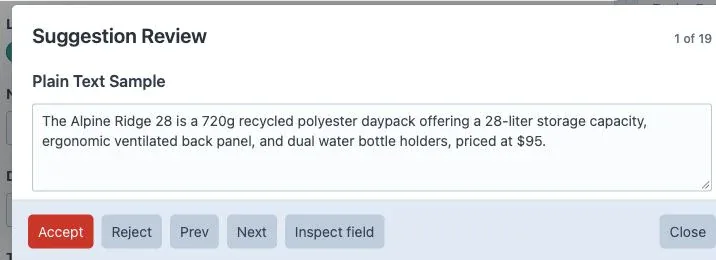
Suggestion Review dialog with editing and review controls
ActionWhat happens
AcceptValidates and saves this field immediately. Edit the suggestion first if the control allows it.
RejectKeeps the existing field value and records your decision.
Prev / NextMoves between suggestions.
CloseLeaves undecided suggestions pending.
RegenerateGenerates fresh results and keeps the run history.
Dismiss runEnds pending work. Values already saved stay saved.

If an accepted value breaks a field rule, such as a character limit or a required field on live content, Autofill shows the error and leaves the saved value unchanged. Correct the suggestion and select Check & apply where available. Reject an invalid read-only suggestion and continue with the other fields. If you see a content-change warning, check the new values before accepting or regenerating.

Some workflows save eligible fields automatically. You can still review the remaining fields. If all suggestions match the saved values, the run completes without review. Reopen the item to see background changes if you had unsaved edits.

When something looks wrong

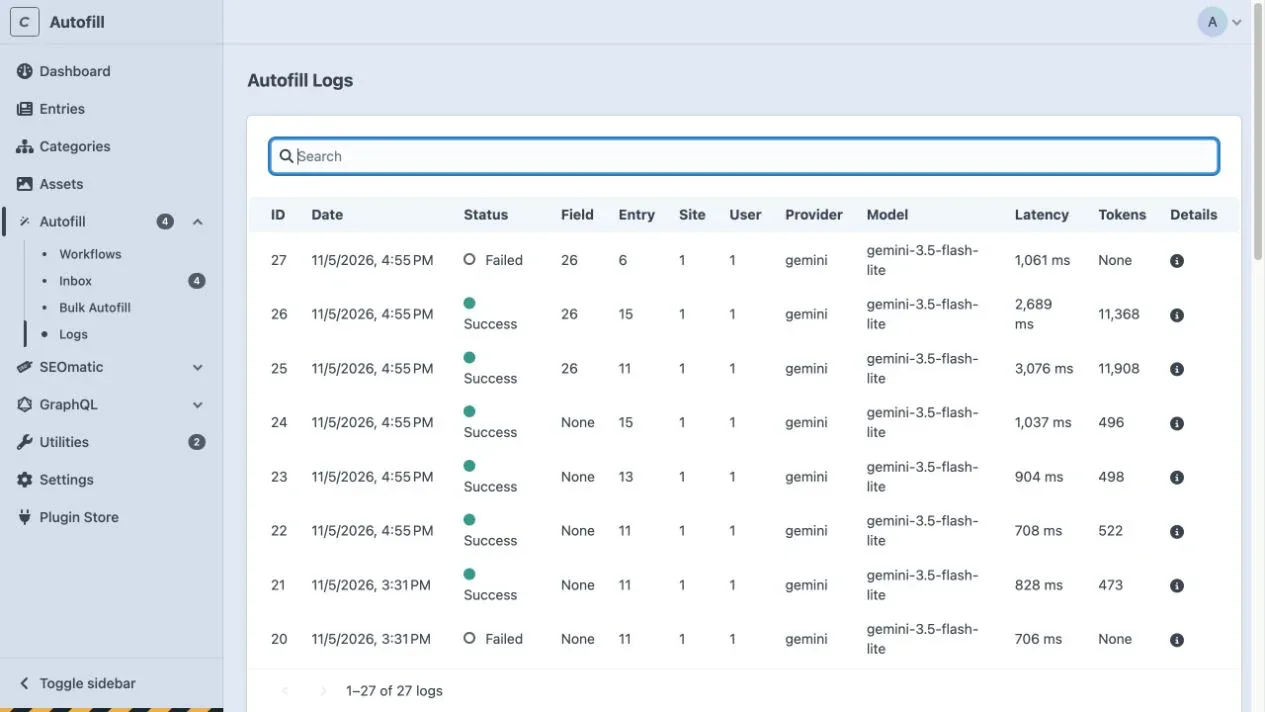
Autofill request logs showing successful and failed requests
  • No launcher: Check that the workflow matches the entry type or asset volume and that you have access. Ask a workflow manager to check placement.
  • Still queued or failed: Ask an administrator to check the queue and request logs.
    • Request timed out. Raise requestTimeout in config/autofill.php.
    • Response was cut off. Raise maxOutputTokens or reduce the number of output fields in the workflow.
    • Run got stuck. Autofill automatically marks a run as failed if it stops responding after a queue worker stops, or if it waits in the queue for more than 24 hours without starting. Select Regenerate to retry.
  • Poor suggestions: Add a specific fact or instruction for this run. If the problem repeats, ask a workflow manager to improve its context or output instructions.
  • Asset alt text or caption: Open the asset and run its workflow there. Files used as context on another item are read-only.

Supported Fields

Available fields depend on the workflow scope, edition, and Craft permissions. Context is read-only; output fields receive suggestions.

FieldEditionContextOutput
Plain TextLite + ProCurrent textText
CKEditorLite + ProCurrent rich-text contentRich text or HTML
EmailLite + ProCurrent email addressEmail address
LightswitchLite + ProCurrent on/off valueOn or off
NumberLite + ProCurrent numberNumber
RangeLite + ProCurrent valueNumber within field limits
MoneyLite + ProCurrent amount and currencyAmount in the field currency
DateLite + ProCurrent date or date and timeDate or date and time
TimeLite + ProCurrent timeTime within field limits
DropdownLite + ProSelected optionOne available option
Radio ButtonsLite + ProSelected optionOne available option
Button GroupLite + ProSelected optionOne available option
CheckboxesLite + ProSelected optionsAvailable options
Multi-selectLite + ProSelected optionsAvailable options
ColorLite + ProCurrent colorColor value
CountryLite + ProCountry codeCountry code
IconLite + ProCurrent icon nameSupported icon name
JSONLite + ProCurrent JSON valueJSON value
SEOmaticLite + ProCurrent supported SEO valuesSelected SEO properties
AddressesProCurrent addressesAddress details
LinkProCurrent link detailsA link using an allowed link type
TableProCurrent rowsRows using the field’s columns
CategoriesProSelected category titlesSelect existing candidates
TagsProSelected tag titlesSelect existing candidates
EntriesProSelected entry titlesSelect existing candidates
AssetsLite + ProSelected asset metadata; optional file contentSelect existing assets
Entry propertiesLite + ProTitle, slug, post date, expiration date, enabled statusThose entry properties
Asset propertiesLite + ProTitle and alt textTitle and alt text
This asset’s fileLite + ProAsset file and metadata, subject to model supportContext only

CKEditor and SEOmatic require their respective plugins. Asset file inputs also depend on the provider and model.

Lite vs Pro Edition

Both editions support background generation, single-item review, sharing, and common field types. Lite allows one active workflow per installation. Archived workflows don’t count toward the limit, but Lite can’t restore them. Pro adds multiple workflows, bulk, the inbox, and Addresses, Link, Table, Categories, Tags, and Entries fields. CKEditor and SEOmatic require those plugins.

The field picker shows available fields for the selected scope. Native entry outputs include Title, Slug, Post Date, Expiration Date, and Enabled. Native asset outputs include Title and Alt text. Downgrading retains workflows and accessible pending results.

Bulk Autofill

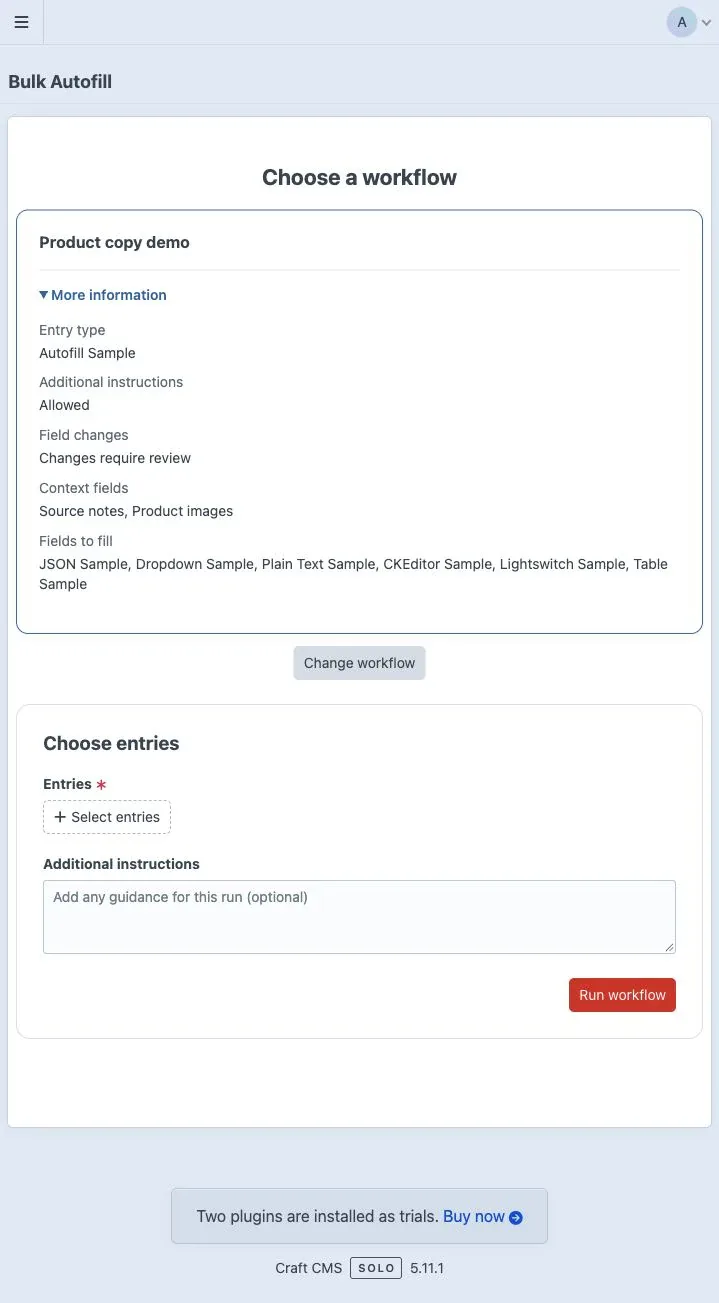
  1. Open Autofill → Bulk Autofill and choose a workflow. More information shows what it reads and changes.
  2. Select matching entries or assets and, if shown, the site. Add instructions if allowed. If any fields can save automatically, acknowledge that before selecting Run workflow. Submitting queues the batch, and there’s no item limit.
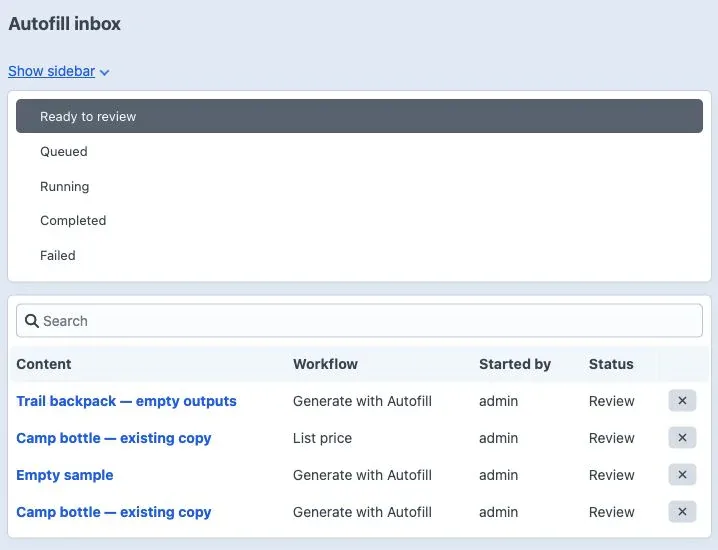
  3. Open Autofill → Inbox. Select Ready to review, then select a row to review results on the original item. Use Review next item or Back to inbox in the editor sidebar. Items that can’t start, for example because you lack permission to save them, appear under Failed.

The Inbox badge shows up to 10+ results ready for review. Autofill removes runs when an entry or asset is permanently deleted. Runs started by deleted users stay available to administrators.

Bulk Autofill showing a selected entry workflow and its settings
Autofill inbox showing reviewable runs and their status

Command line

./craft autofill/bulk/run --workflow=product-copy --element-ids=12,34 --user=editor

Use --confirm-automatic=1 when enabled outputs can save automatically. --run-now=1 processes generation immediately and keeps review outputs pending. Optional flags include --site-id and --user-prompt. Legacy field and entry identifiers still work with migrated workflows. Custom callers must handle persisted run status and review.

Test Mode

Test Mode lets you inspect the prompt Autofill builds from your workflow’s context and output fields without an API key or a live AI request. It is mainly useful for understanding the prompt or troubleshooting a specific issue.

Enable it in plugin settings, then select Preview in the sidebar or Generate in an inline field. You can paste a JSON response to try the review process. Accepted test suggestions can save content. Turn Test Mode off for live runs.

Request Logs

Administrators can search Autofill → Logs and expand request details. Logs can contain source text and generated values. File bytes and temporary links are excluded. Autofill has no retention setting, so logs are kept until removed.

Permissions and sharing

In Craft’s user or group permissions, enable Access Autofill under General first. This gives users access to Autofill in the control panel and is required for its workflow permissions.

Under Autofill, grant only the capabilities each role needs:

  • View own workflows / View other users’ public workflows: See workflows you own or shared workflows owned by others.
  • Create workflows: Create new workflows.
  • Edit own workflows / Edit other users’ public workflows: Change workflows you own or shared workflows owned by others. The corresponding view permission is also required.
  • Run workflows: Start a workflow the user can view. Users also need permission to view and save the target entry or asset.
  • Review and apply results: Review and accept suggestions. To see or review another user’s public results, also grant View other users’ public workflows and Review other users’ public results.
  • Run bulk Autofill: Run workflows across multiple items in Pro.
  • Configure automatic application: Set output fields to apply eligible suggestions without review.
  • Archive own workflows / Archive other users’ public workflows: Archive workflows or use the × button on the Workflows list within the permitted scope.

New workflows are private to their creator and administrators. Turn on Share to make a workflow available to eligible users. Craft content and field permissions still apply; earlier runs retain their original audience.

Queued or processing runs lock workflow edits. Autofill automatically marks stuck runs as failed, which releases the lock. Archive workflow in the workflow editor moves it to the Archived list. Administrators can restore workflows from this list in Pro. The × on the Workflows list permanently removes a workflow with no run history. If the workflow has run history, Autofill archives it and keeps its history.

Asset inputs and outputs

Autofill works with existing assets. It does not create image files or other assets. As an output, an Assets field selects existing assets; it does not create them.

To use an image as context for an entry, add an Assets context field and select the metadata to include. File content is enabled by default for new Assets context fields; turn it off if it is not needed. The model can use the image when suggesting fields for a post or another entry.

To suggest alt text or a caption for an image, create a workflow for its asset volume. Add This asset’s file as context and Alt text or a caption field as an output.

For entry context, Autofill uses the first selected assets in field order. A newly added Assets context field defaults to one asset; you can choose up to 20 per input; file limits are 10 MiB each and 20 MiB combined. File input requires provider and model support.

AI agents (MCP)

On Craft 5.12 and later, AI agents can set up and run Autofill through Craft’s MCP server. They can find fields, create and edit workflows, preview prompts, run workflows and read the results.

  1. Enable the server in Settings → MCP
  2. Connect your agent following Craft's directions
  3. Ask the agent to call `autofill_guide`.

Agents work as the signed-in user, within that user’s Autofill permissions. Every output an agent creates requires review, and only people accept or reject results. Runs an agent starts also hold automatic outputs for review, unless you turn on Let AI agents apply automatic outputs in Autofill’s settings.

Upgrade guide

Back up the database and project config, then apply Craft plugin migrations. Existing field configurations become public, administrator-managed workflows. Uninstalling Autofill removes its workflows, runs, and request logs.

After upgrading, update Craft user or group permissions. Under General, enable Access Autofill. Under Autofill, grant View other users’ public workflows, Run workflows, and Review and apply results for editors who need to use migrated workflows. Add Review other users’ public results for editors who need to review results started by others. Add View own workflows where applicable, and Run bulk Autofill for Pro users who need bulk runs. Grant other permissions as needed. Editors also need Craft access to view and save the relevant entries or assets.

Check the migrated workflow settings and queue worker, then try a single run and, if using Pro, a small bulk run.